Binding your own books at home offers a creative and practical way to organize documents, make notebooks, or even self-publish written work. Whether you’re crafting a zine, preserving recipes, or making a handmade journal, several effective DIY binding methods require only basic tools and supplies. This guide walks you through some of the most popular and accessible home binding techniques.

Saddle Stitch Binding (Staple Binding)
Saddle stitch is one of the easiest methods to do at home and is perfect for small booklets.
What You Need:
-
A long-arm stapler (or regular stapler with some flexibility)
-
Folded sheets of paper
-
A bone folder (optional, for sharper folds)
How It Works:
Fold your pages in half and nest them together. Align them well, and staple along the fold—typically two or three evenly spaced staples. This works best for books with fewer than 40 pages.
Best For:
-
Zines
-
Comic books
-
Small notebooks
-
Event programs
Perfect Binding (Glue Binding)
Perfect binding offers a more professional appearance, similar to paperback books. You can do a simplified version at home.
What You Need:
-
A strong adhesive (PVA glue or hot glue)
-
Binder clips or clamps
-
Thick cover paper (optional)
-
Craft knife and ruler
How It Works:
Stack your pages evenly, clamp them together, and apply glue along the spine. Let it dry thoroughly. Once dry, attach a cover by gluing it to the outermost pages or spine.
Best For:
-
Manuscripts
-
Journals
-
Short novels
-
Reports
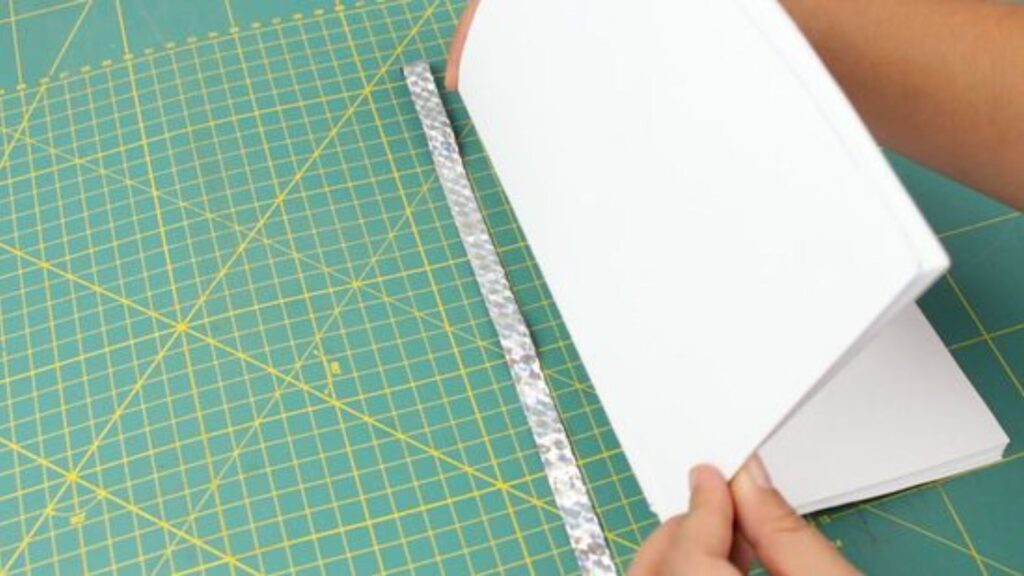
Japanese Stab Binding
Japanese stab binding is both decorative and functional. It binds the book from the outside, without folding the pages.
What You Need:
-
Needle and strong thread or waxed linen
-
Hole punch or awl
-
Ruler and pencil for marking holes
-
Binder clips (to keep pages aligned)
How It Works:
Punch evenly spaced holes along the edge of your pages. Use a thread and needle to sew through the holes in a looping pattern. There are many decorative variations of this method.
Best For:
-
Journals
-
Poetry collections
-
Guest books
-
Art books
Comb or Spiral Binding
Though commonly done with machines, you can simulate this method at home with basic tools and a binding comb or spiral.
What You Need:
-
Plastic combs or metal spirals (available at office supply stores)
-
Hole punch or special comb punch
-
Scissors or craft knife
How It Works:
Punch holes along one edge of your document. Thread the comb or spiral through the holes to bind the pages together. This allows the book to open flat.
Best For:
-
Notebooks
-
Cookbooks
-
Workbooks
-
Training manuals
Coptic Stitch Binding
Coptic stitch binding is a hand-sewn method that allows your book to lay completely flat when open. It’s more time-consuming but creates beautiful, long-lasting books.
What You Need:
-
Heavy thread or embroidery floss
-
Needle
-
Cover boards (e.g., cardboard)
-
Awl or hole punch
How It Works:
Fold pages into signatures (booklets), punch holes, and sew them together with a chain stitch technique, connecting them to the covers as you go.
Best For:
-
Sketchbooks
-
Handmade journals
-
Art books
-
Gift books
Tips for Successful DIY Binding
-
Use quality paper and thread/glue to increase durability.
-
Measure twice, bind once—precision matters in DIY projects.
-
Press your book under weight after binding to help it set evenly.
-
Experiment with scrap paper before trying a full project.
Conclusion
DIY home binding methods let you take control of your creativity and document organization. Whether you’re making a personal journal or a self-published book, there’s a binding method for every project size, skill level, and aesthetic. With just a few tools and some practice, you can produce beautifully bound books right from your own desk.